
Uploading Data to GSB
Load your prepared price data files into GSB Pro for system development
Overview
Once you have exported data from TradeStation/MultiCharts and saved it in the correct format and location, you need to upload that data into GSB Pro so it can be used for trading system development.
Step 1: Access Price Data Section
In GSB Pro's left sidebar:
- Locate the Data section
- Click on Price Data
- The Price Data window will appear
Step 2: Add Symbol Name
Before you can upload data files, you must register each symbol:
- In the Price Data window, click the Add button or right-click
- A popup window will appear prompting you to enter the symbol name
- Type the symbol exactly as it appears in your data filename (e.g., "ES.30", "AAPL.30", "SPX.30")
- CRITICAL: Press ENTER when done entering the symbol name
- Click OK to confirm
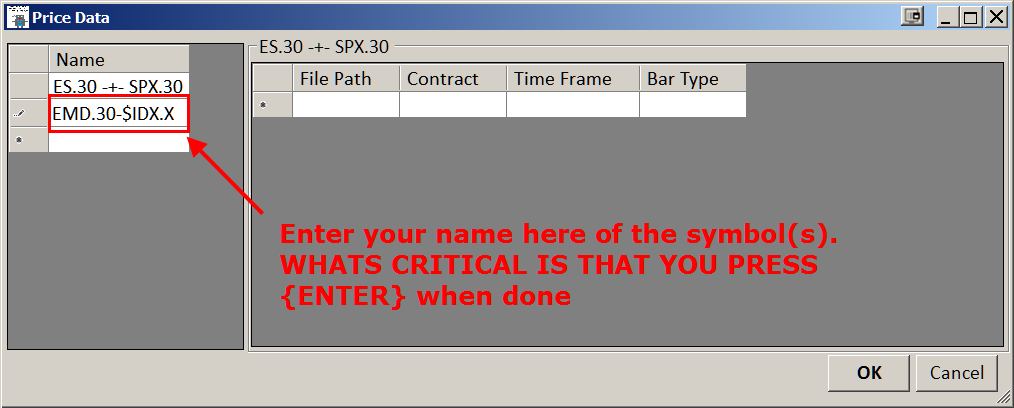
Enter your symbol name and press ENTER before clicking OK
If your data file is named:
ES.30.Minute.830_1500.CentralUSATime.txtThen your symbol name should be: ES.30
Step 3: Select Data File
After adding the symbol, GSB will prompt you to locate the data file:
- A file browser window will open
- Navigate to
C:\GSB\Data\Price Data\ - Click on ONE file name - do not select multiple files
- Click Open
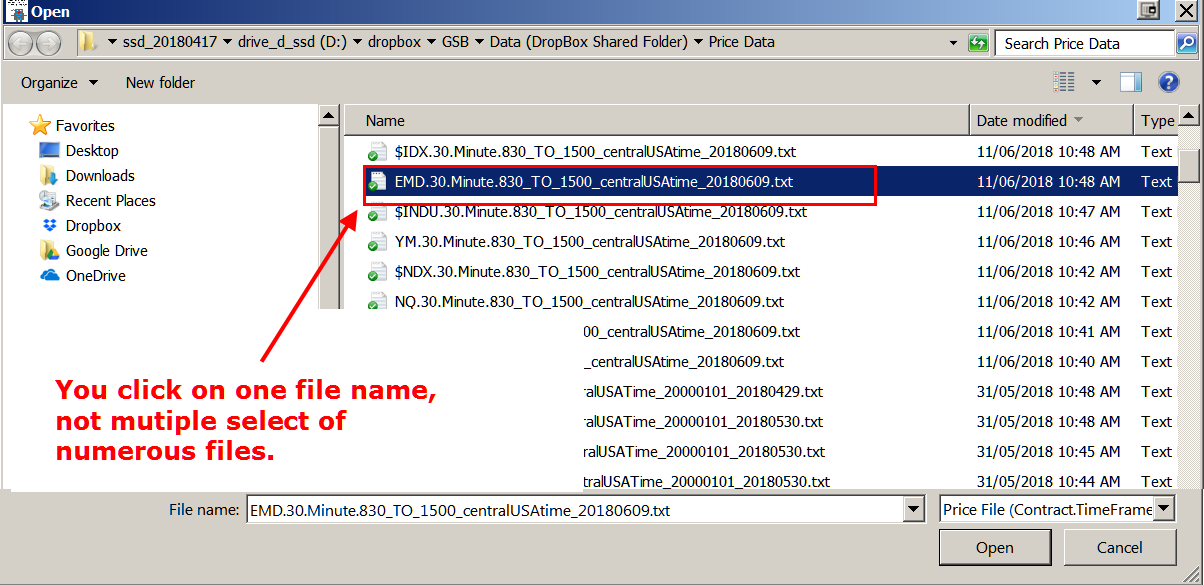
Select one file at a time - do not select multiple files
Step 4: Configure Multiplier and Contract Settings
GSB will display configuration options for your data:
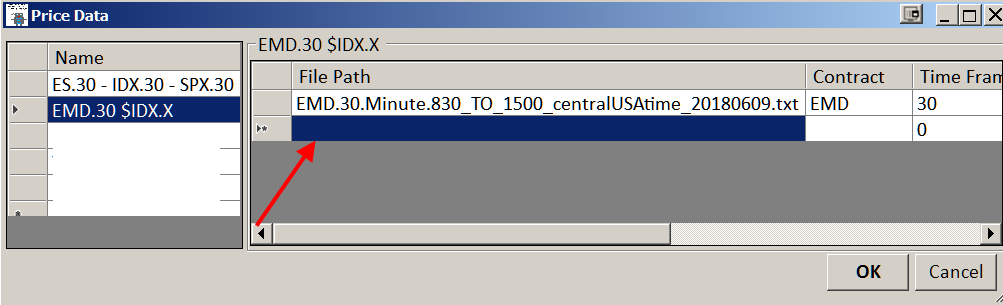
GSB auto-populates settings from your filename
File Path
Shows the full path to your selected data file. GSB extracts configuration details from the filename.
Contract
The contract symbol extracted from your filename (e.g., "EMD" for E-mini Dow, "ES" for E-mini S&P 500).
Time Frame
The bar interval extracted from your filename (e.g., "30" for 30-minute bars, "0" for tick data).
Verification
Review all auto-populated settings carefully before clicking OK. Incorrect settings will cause system development errors.
Step 5: Add Secondary Data (Optional)
For stock systems, GSB performs better when using an index as secondary data (e.g., SPX for stocks, or a correlated market for futures). To add secondary data:
- Repeat Steps 2-4 for your secondary symbol
- Common secondary symbols include SPX.30 for stock systems
- Ensure session times match between primary and secondary data
- Use an index for stock systems (SPX is recommended)
- Match session times between primary and secondary data
- Verify compatibility of time zones and data formats
- Secondary data improves system robustness and performance
Step 6: Verify Data Upload
After uploading all symbols:
- Check that all symbols appear in the Price Data list
- Verify the correct number of bars loaded for each symbol
- Look for any error messages or warnings
- Confirm data date ranges are correct
Repeat for All Symbols
Continue adding symbols using Steps 2-4 until you have uploaded all your primary and secondary (if applicable) data files. Each symbol/pair must be added individually.
Troubleshooting Common Issues
Ensure your data file is saved in C:\GSB\Data\Price Data\ and the filename matches the exact format required by GSB.
GSB should auto-detect date formats. If errors occur, verify your date format is added in Tools → App Settings → Data → Date Formats.
Check your data export settings in TradeStation/MultiCharts. Ensure you've exported the full date range and session times are correct.
Next Steps
With your data successfully uploaded, you're ready to:
- Configure GSB settings for system development
- Start building trading systems using your data
- Run optimization and walk-forward testing